How to use SQL Developer to work with an Oracle database
In this chapter, learn how to use Oracle SQL Developer to review or modify your database design, navigate database objects and create, export and import database connections.
Murach's Oracle SQL and PL/SQL
Chapter 2, How to use Oracle SQL Developer and other tools
 |
|
This chapter from Murach's Oracle SQL and PL/SQL explains how to work with Oracle SQL Developer and other tools. In this section, learn how to use Oracle SQL Developer to review or modify your Oracle database design. Learn how to navigate database objects and create, export and import Oracle database connections.
![]() How to work with the Oracle database home page
How to work with the Oracle database home page
![]() How to use SQL*Plus in Oracle
How to use SQL*Plus in Oracle
![]() How to use SQL Developer to work with an Oracle database
How to use SQL Developer to work with an Oracle database
![]() How to view and edit table column definitions
How to view and edit table column definitions
![]() How to use SQL Developer to run SQL statements
How to use SQL Developer to run SQL statements
![]() How to use the Oracle Database SQL Reference manual
How to use the Oracle Database SQL Reference manual

Oracle SQL Developer is a free graphical tool that makes it easy to work with Oracle databases, and it's the tool that we recommend for working with an Oracle database. As you will see, this tool makes it easy for you to review or modify the design of a database.
As of press time for this book, the current version of SQL Developer is version 1.5, so that's the version presented in this chapter. However, with some minor variations, the skills presented in this chapter should work for later versions as well.
|
||||
When you use SQL Developer, you can connect to any Oracle Database version 9.2.0.1 or later. To connect to earlier versions, you need to use another tool such as the SQL*Plus tool described in the previous figure.
How to create a database connection
Before you can work with a database, you need to create a connection to the database. When you start SQL Developer, the Connections window displays all available database connections. To create a new connection, you can use the procedure described in figure 2-4.
If you have installed the software for this book as described in figure A-5 of appendix A, the AP, OM, and EX users with passwords of AP, OM, and EX will be available on your system. As a result, you will be able to create connections for these three users. Specifically, we suggest that you use the AP user to work with the tables in the AP schema, the OM user to work with the tables in the OM schema, and the EX user to work with the tables in the EX schema.
When you create a database connection, you should note that the usernames and passwords are not case-sensitive. As a result, it doesn't matter if you enter the usernames and passwords in uppercase or lowercase. In this figure, for example, I entered the usernames and passwords in lowercase because it's easier to type in lowercase.
How to export or import database connections
If you want to copy several database connections from one computer to another, you can export the database connections to an XML file as described in this figure. Then, you can use this XML file to import those database connections on another computer. For example, I exported the database connections for the AP, OM, and EX users to this file:
c:murachoracle_sqldb_setupconnections.xml
As a result, if you want, you can use the technique shown in this figure to import the connections that are stored in this file.
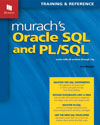
The dialog box for creating database connections
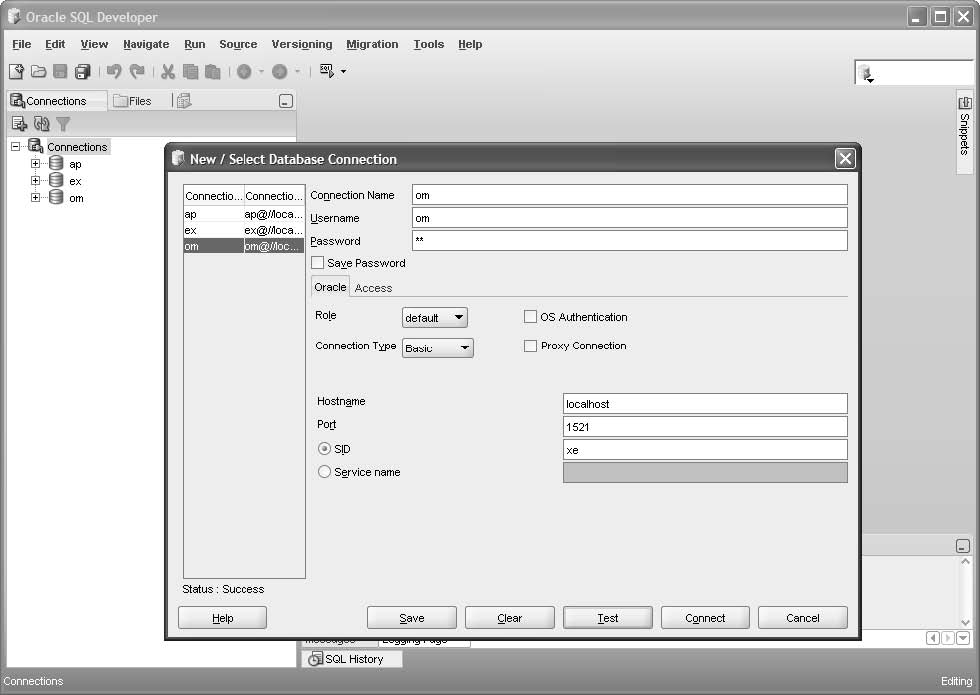
Figure 2-4 How to create, export, or import a database connection
How to create a database connection
1. Right-click on the Connections node in the Connections window and select the New Connection command to display the dialog box for creating database connections.
2. Enter a connection name, username, and password for the connection.
3. Click the Test button to test the connection. If the connection works, a success message is displayed above the Help button.
4. Click the Save button to save the connection. When you do, the connection will be added to the dialog box and to the Connections window.
How to export or import database connections
- To export database connections, right-click the Connections node, select the Export Connections command, and use the resulting dialog box to select the connections that you want to export and to specify the path and filename for the XML file for the connections.
- To import connections, right-click the Connections node, select the Import Connections command, and use the resulting dialog box to navigate to the XML file for the connections.
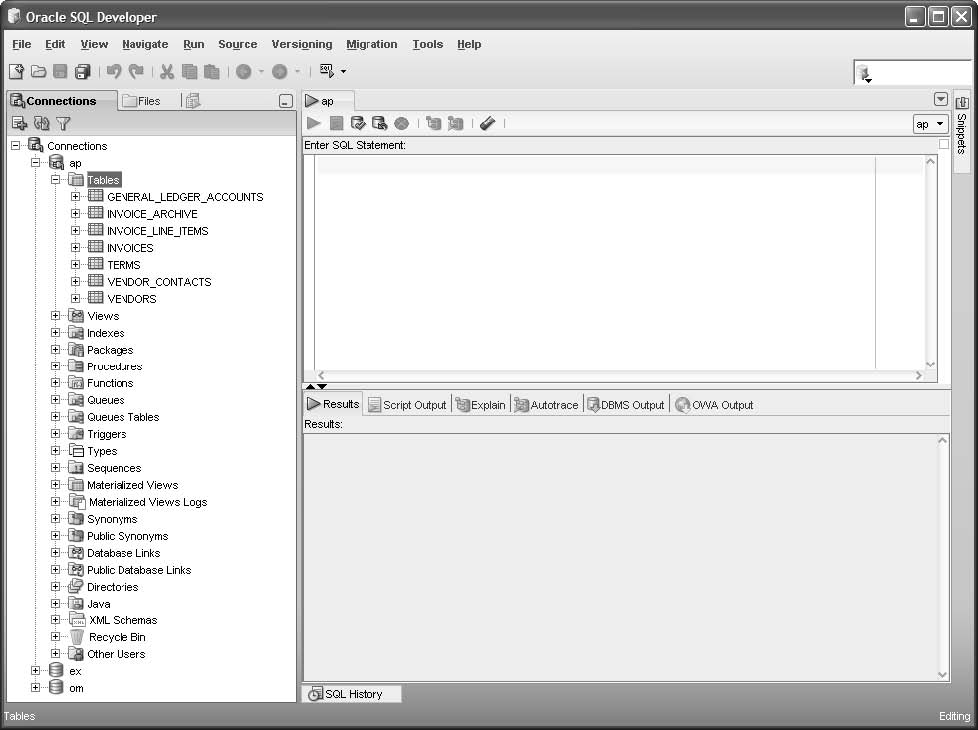
How to navigate through the database objects
Figure 2-5 shows how to navigate through the database objects that are available to the user that corresponds with the current database connection. These database objects include tables, views, indexes, and so on. For this chapter, however, you can focus on the tables. Later in this book, you'll learn more about views, indexes, and other database objects.
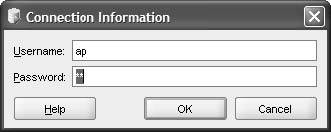
When you expand a connection for the first time in a session, you must enter the password for the username in the Connection Information dialog box. In this figure, for example, I clicked on the plus sign (+) to the left of the node for the AP connection. Then, SQL Developer prompted me for the password for the user named AP. When I entered the correct password, SQL Developer expanded the AP connection and displayed a SQL Worksheet window for the AP connection.
Once you expand a connection, you can navigate through the objects that are available for the user that corresponds to the connection. To do that, you can click on the plus (+) and minus (-) signs to the left of each node to expand or collapse the node. In this figure, for example, I expanded the Tables node to view all of the tables available to the AP user.
To work with a node or an object, you can right-click on the object to display a context-sensitive menu. Then, you can select a command from the resulting menu. For example, you can right-click on the node for the AP connection to display a list of commands for working with that connection.
The Connection Information dialog box
The tables available to the AP user
Figure 2-5 How to navigate through the database objects
Description
- Each connection provides access to the database objects that are available to the user that corresponds with the connection. These database objects include tables, views, and so on.
- Before you can expand a connection for the first time in a session, you must enter the correct password for the connection. Once you enter a password for a connection, you can navigate through the nodes for the database objects. You can also use the SQL Worksheet window to enter and run SQL statements.
- To navigate through the database objects for a connection, click on the plus (+) and minus (-) signs to the left of each node to expand or collapse the node.
- To work with a node or an object, right-click on the node or object and select a command from the resulting menu.
Download the chapter "How to use Oracle SQL Developer and other tools" in PDF form.
Continue to the next section:How to view and edit column definitions for a table


